Getting Started
Link your Google Calendar to Simple Calendar
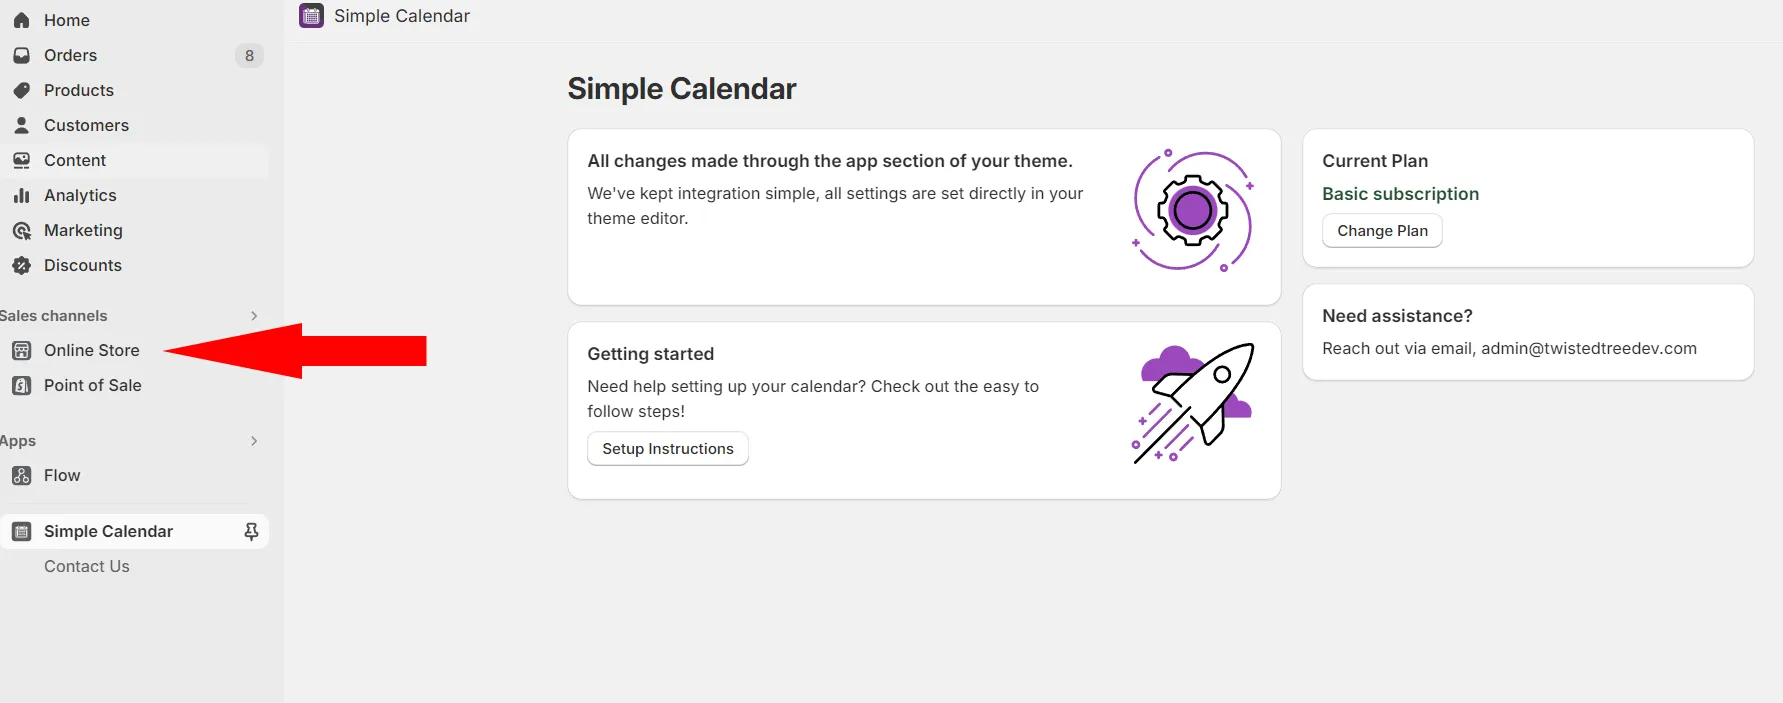
Adding the app to Shopify
After installation, go to your online store.
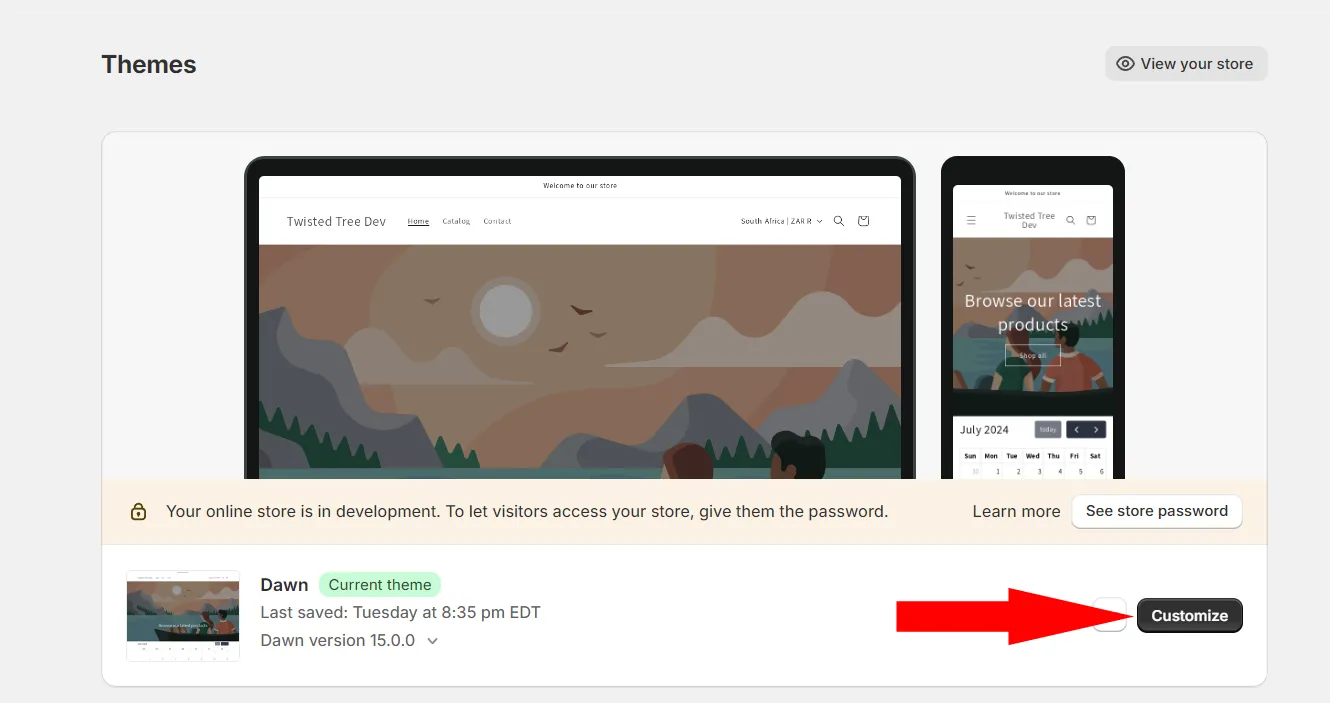
Click customize for the theme you want to edit.
Click to add a new section, either on the left or inbetween sections on the right
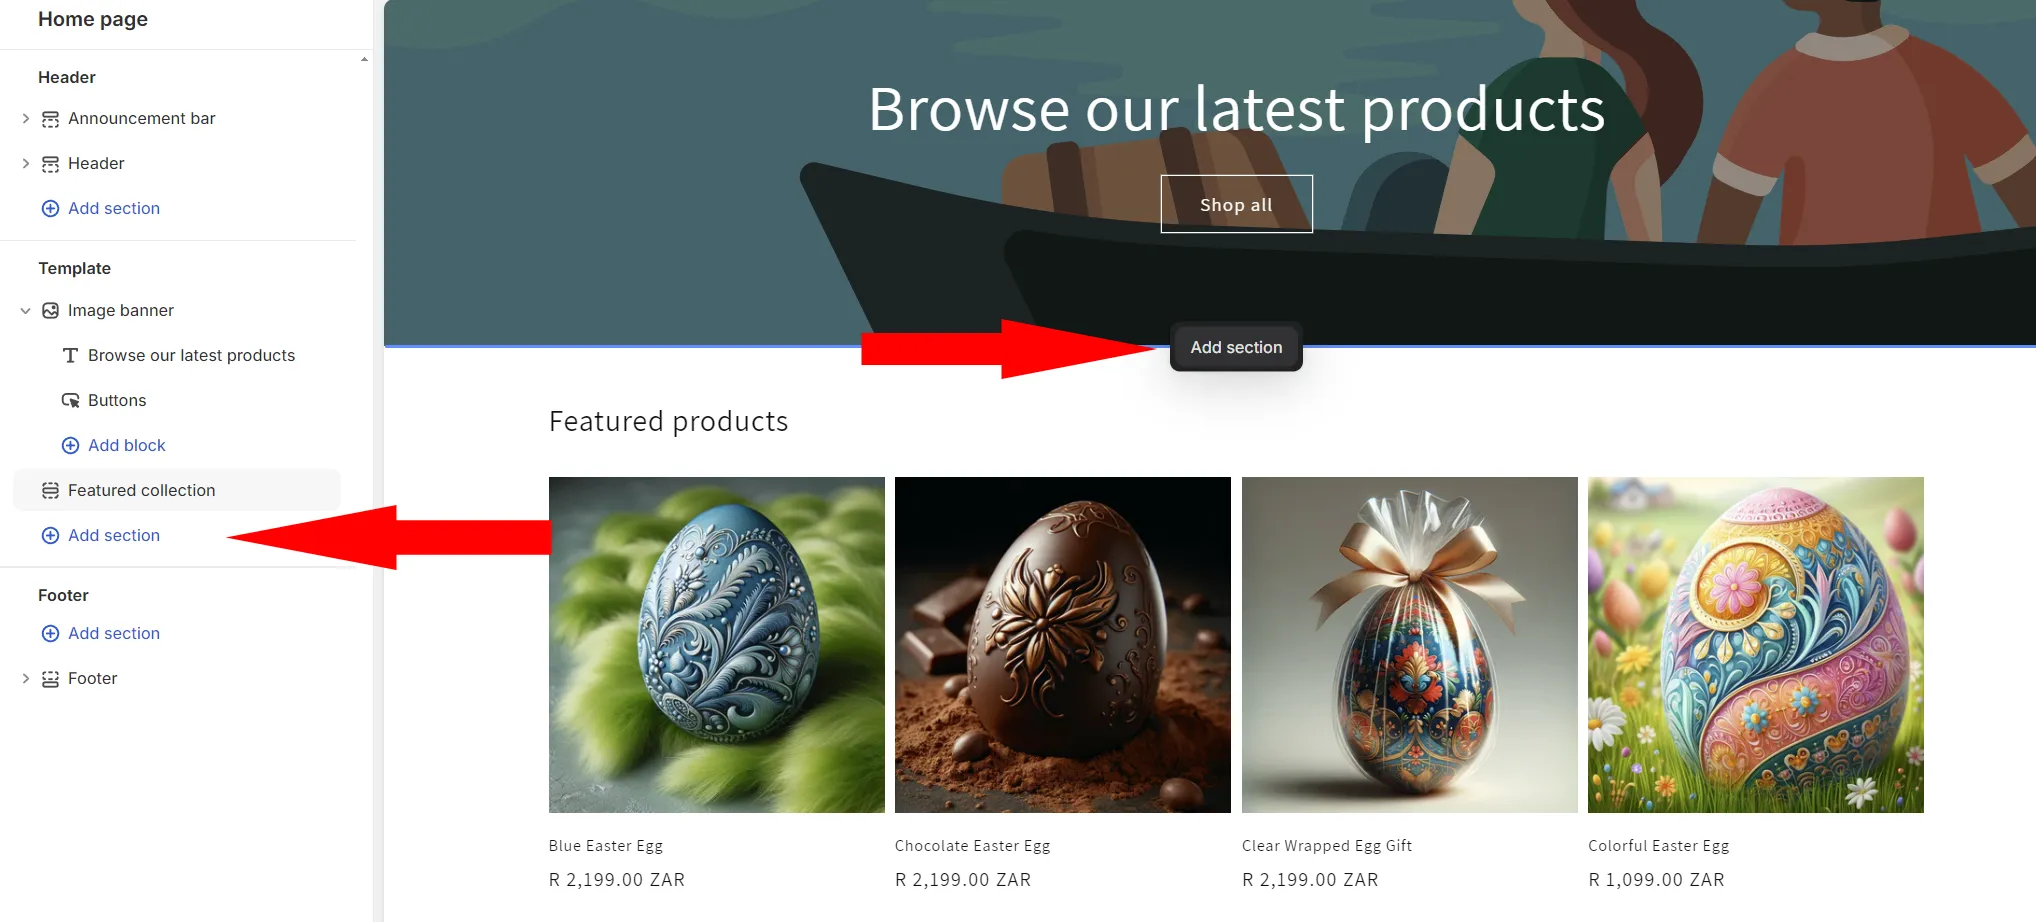
Choose Simple Calendar from the Apps tab

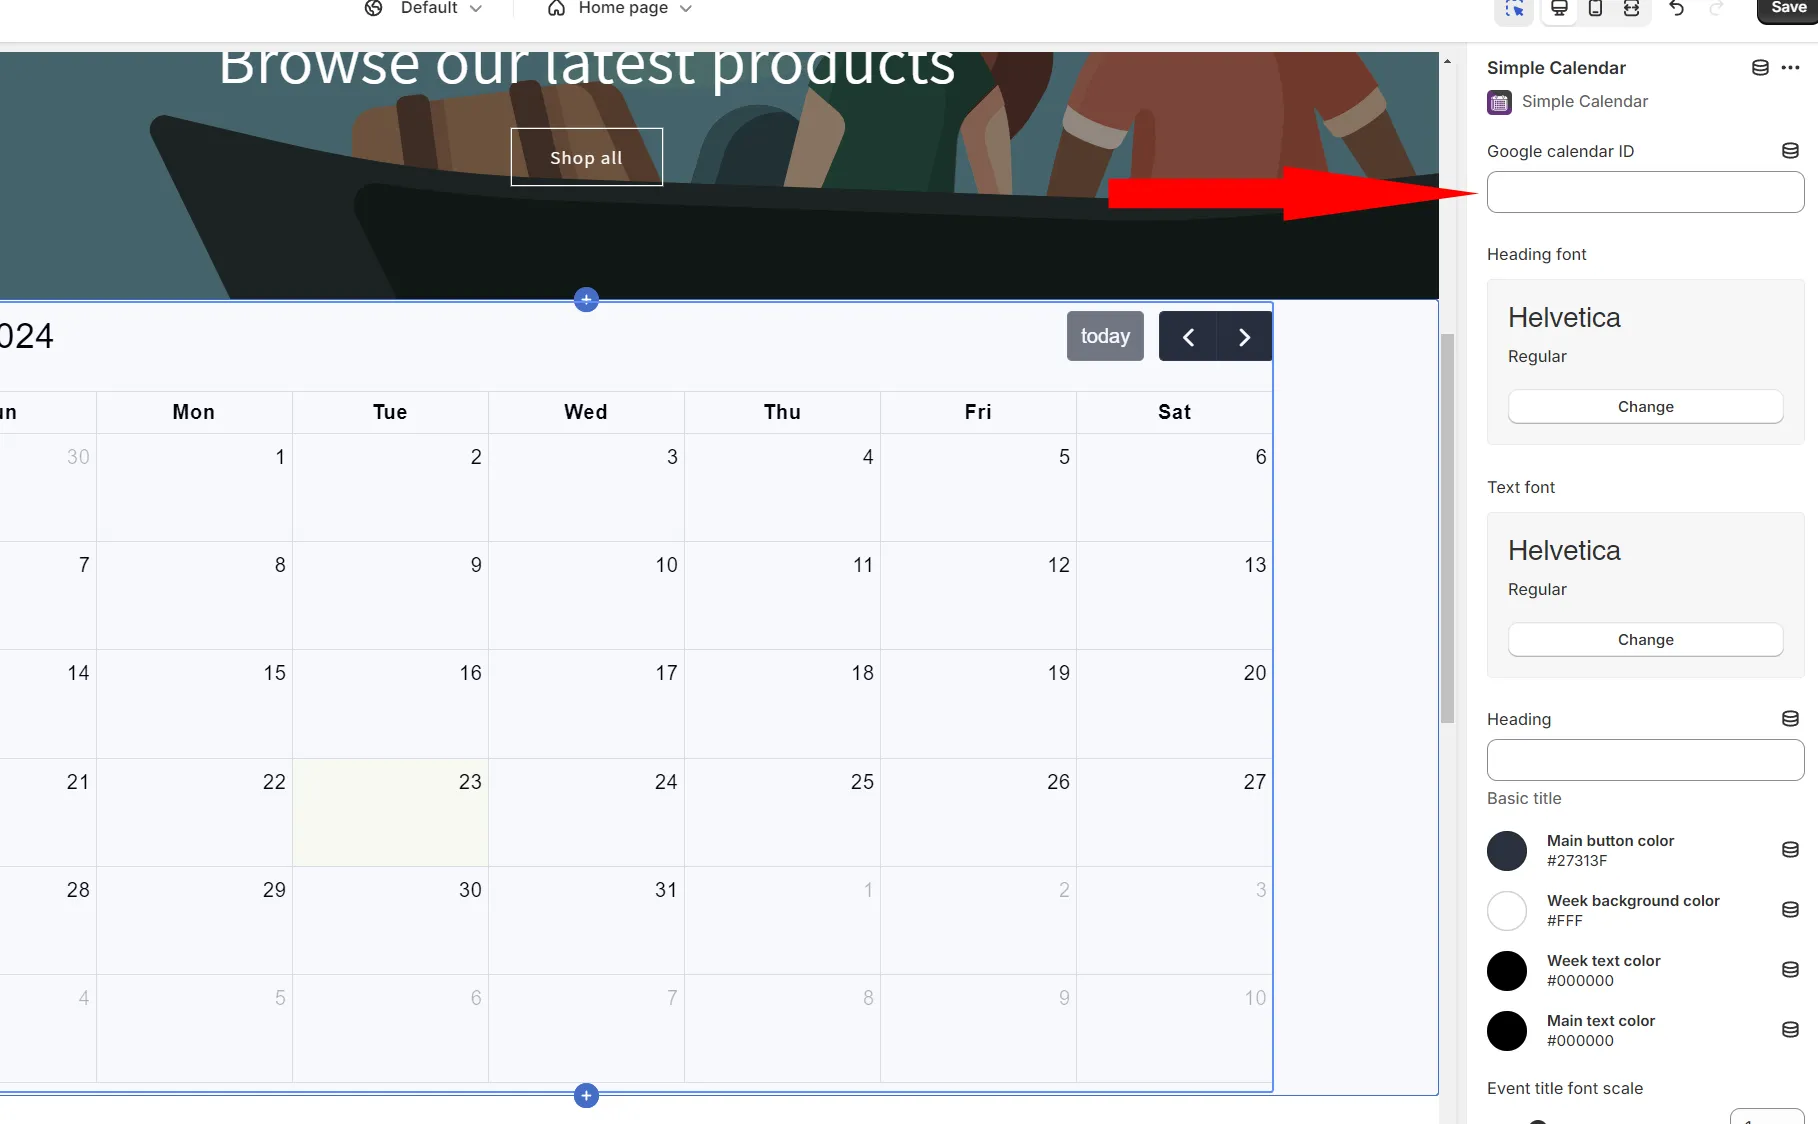
Your initial Calendar will be empty, you need to paste your public Google calendar ID where indicated. See below on how to retrieve or create that.
Creating or retrieving a Google Calendar ID
Go to your Google Calendars https://calendar.google.com/calendar/u/0/r Click the + icon to create a new calendar if you need to. Follow the steps to create.

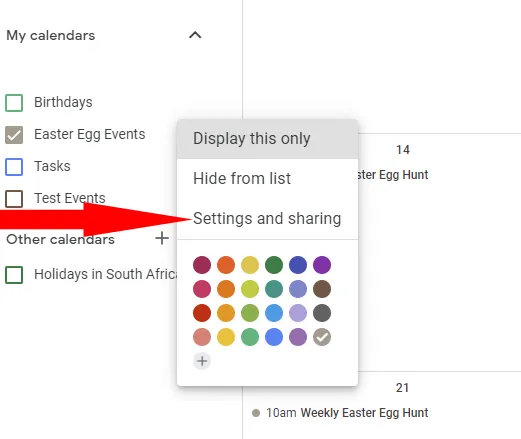
Afterwards click the 3 dots that appear next to an existing calendar and click “Settings and sharing”
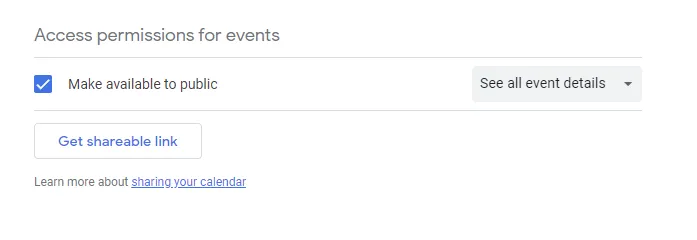
You’ll see setting “Access permissions for events” as seen below. You need to make sure “Make available to public” is enabled so that your customers can see your events. You also need to make sure “See all event details” is selected.
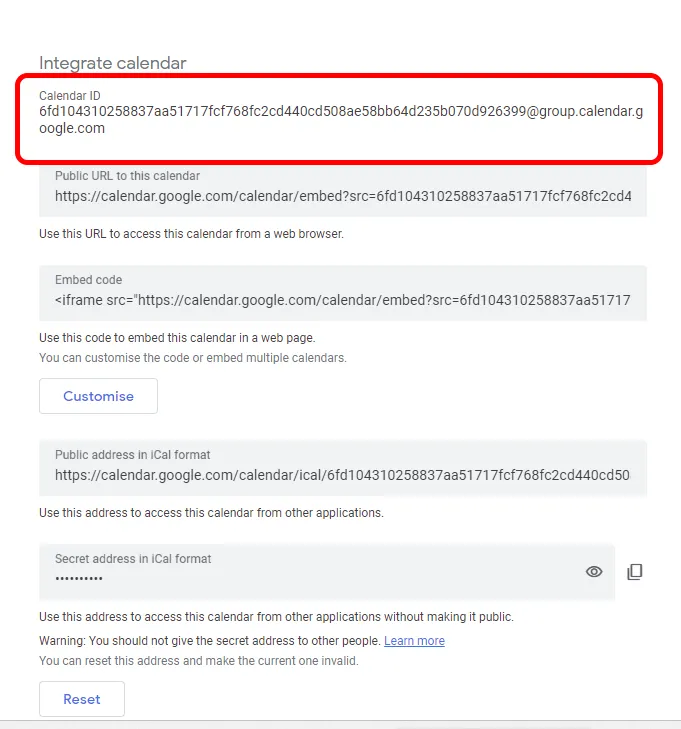
Copy the google calendar circled in red into the field in the Simple Calendar app.
Enter it as seen below.